How to automatically arrange meetings with Scheduling Poll
This article was produced by Eliot Cole.
There are a few ways to use the Scheduling Poll, but here’s a quick guide on how to set up a meeting that arranges itself.
Note: Remember to use your ‘Book With Me’ links for One-To-One meetings, as that is even less hassle for you and your potential meeting participants: https://outlook.office.com/bookwithme/me
Using Scheduling Poll To Automatically Arrange The Meeting
What follows is a four step guide to setting up a meeting that will then arrange itself.
1. Ready Your Email
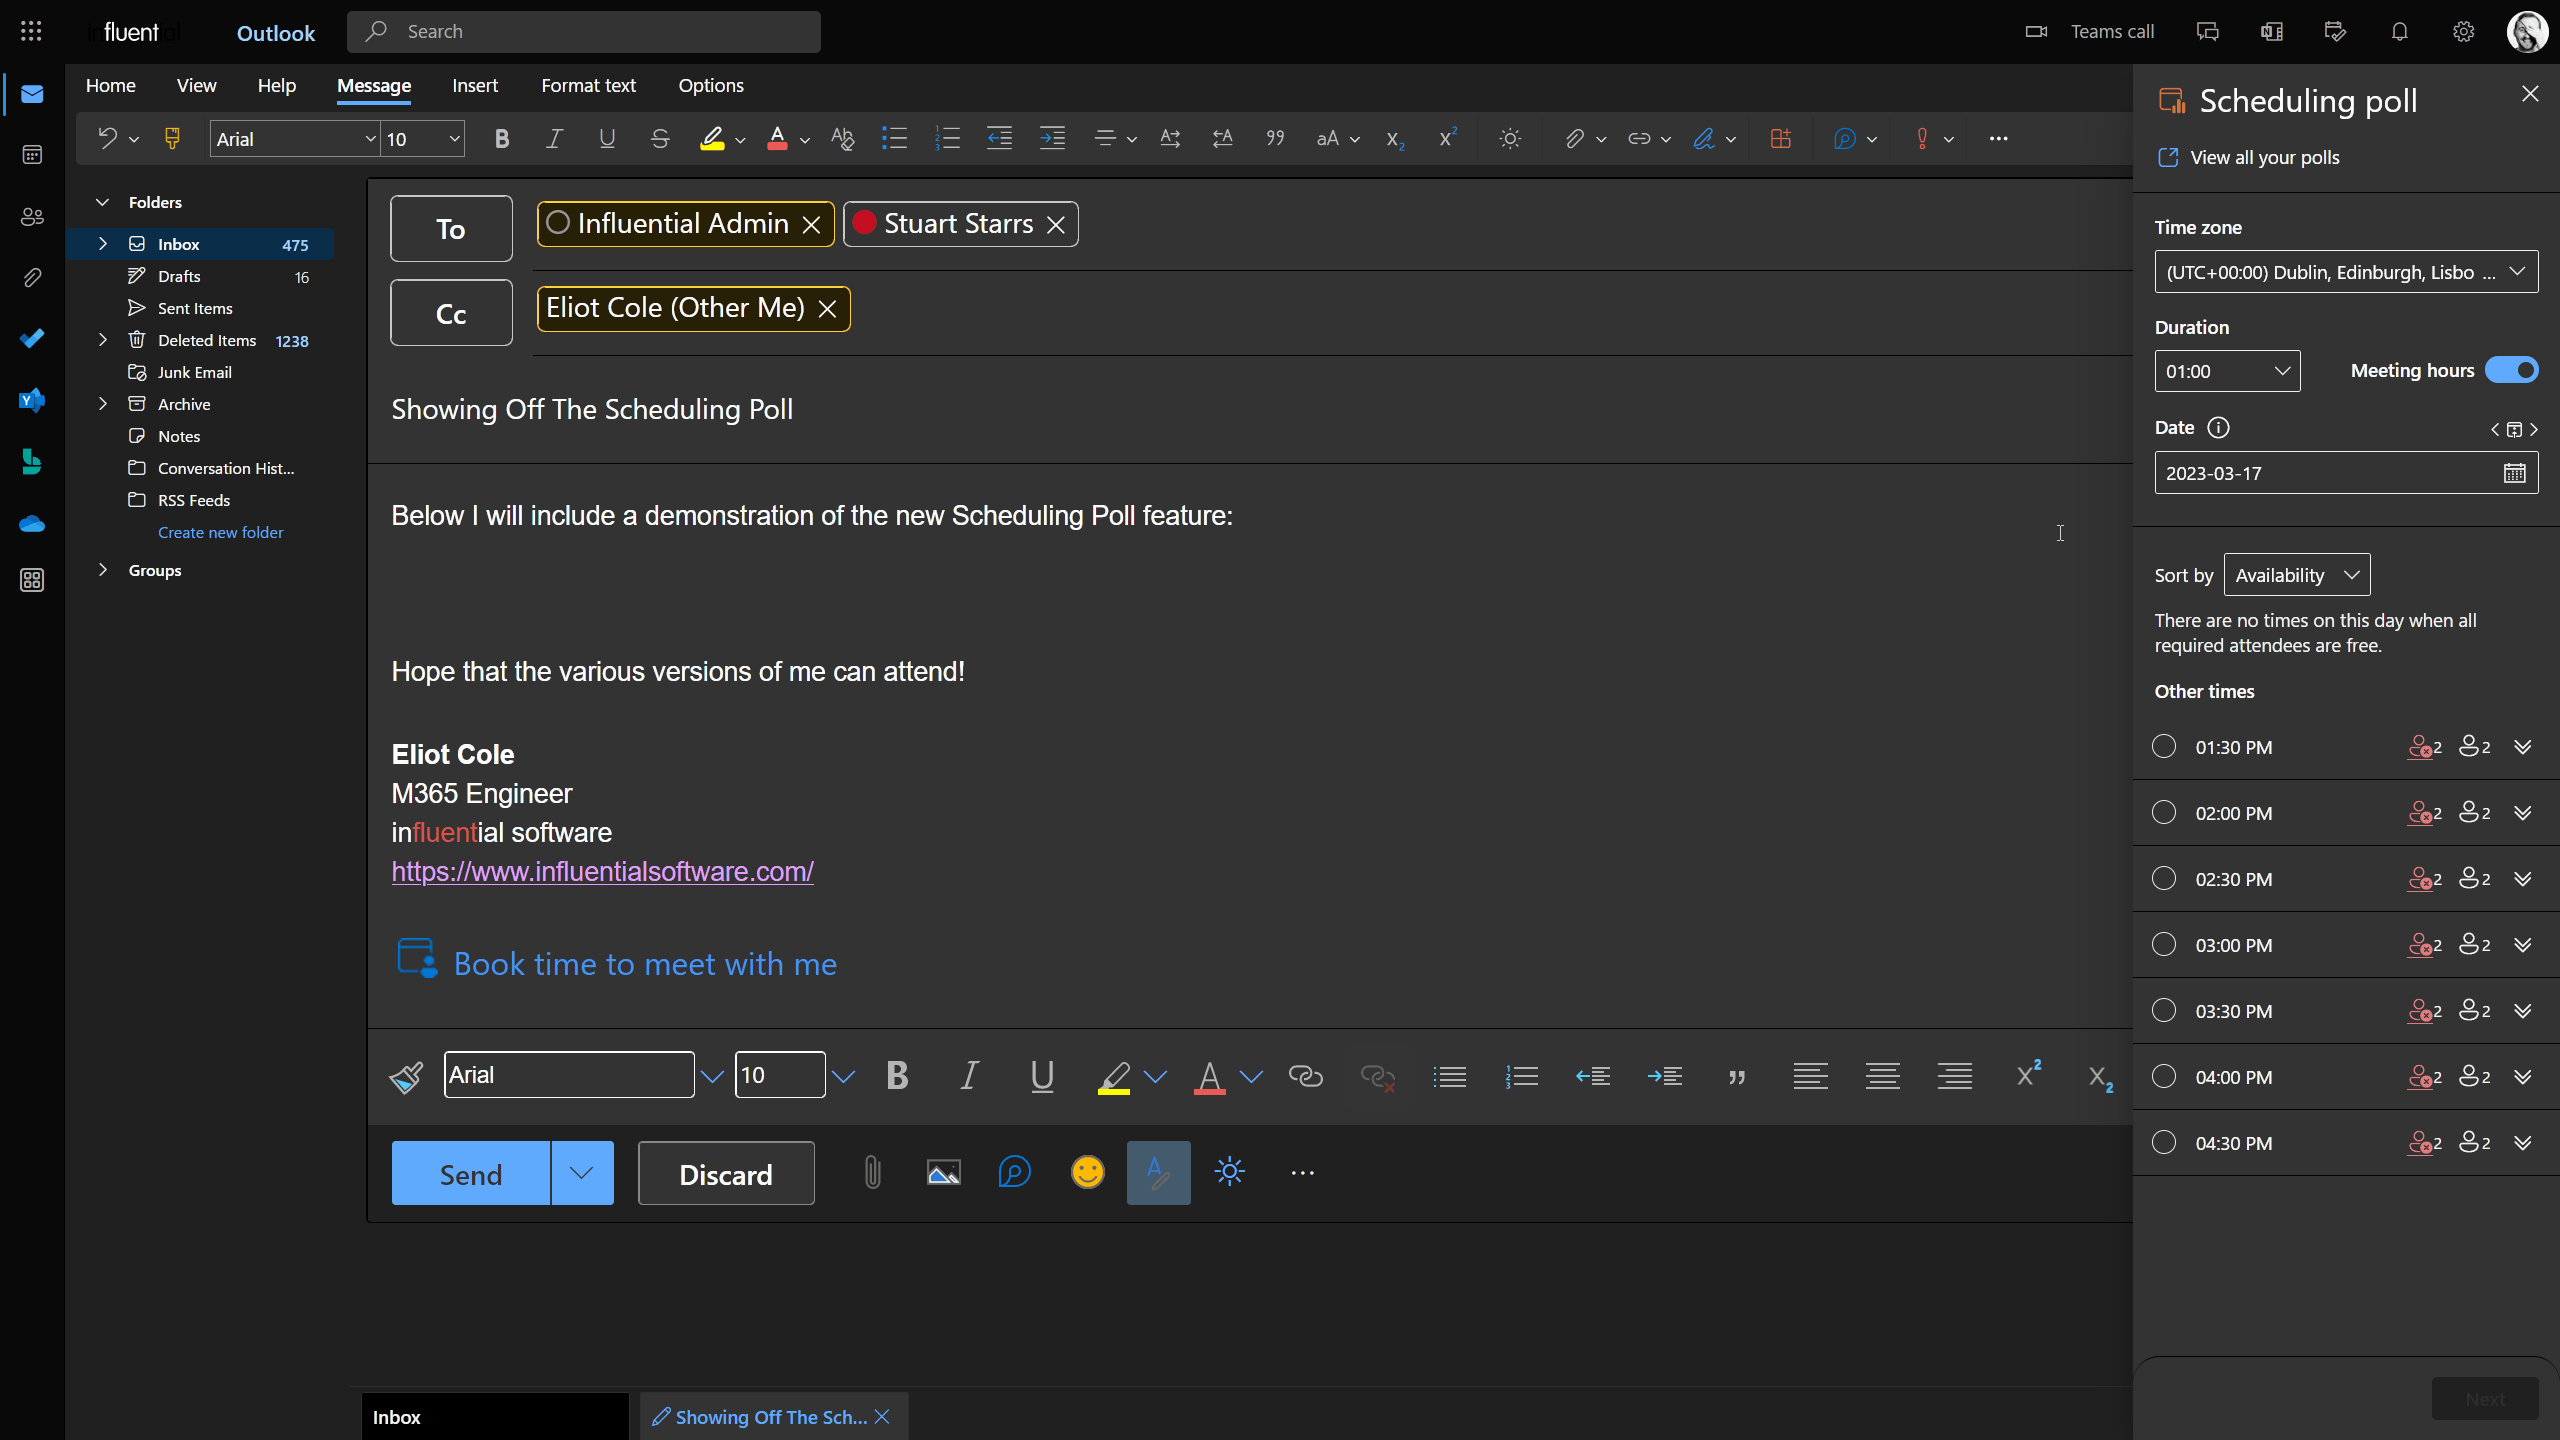
First of all, ensure that you’ve opened outlook.office.com and have started a new email.
Now, ensure that your address fields are mapped out as follows:
To = Required attendees
Cc = Optional attendees
Then tap the top right three dot menu in your email and tap ‘Scheduling poll’ which will bring up the next step.
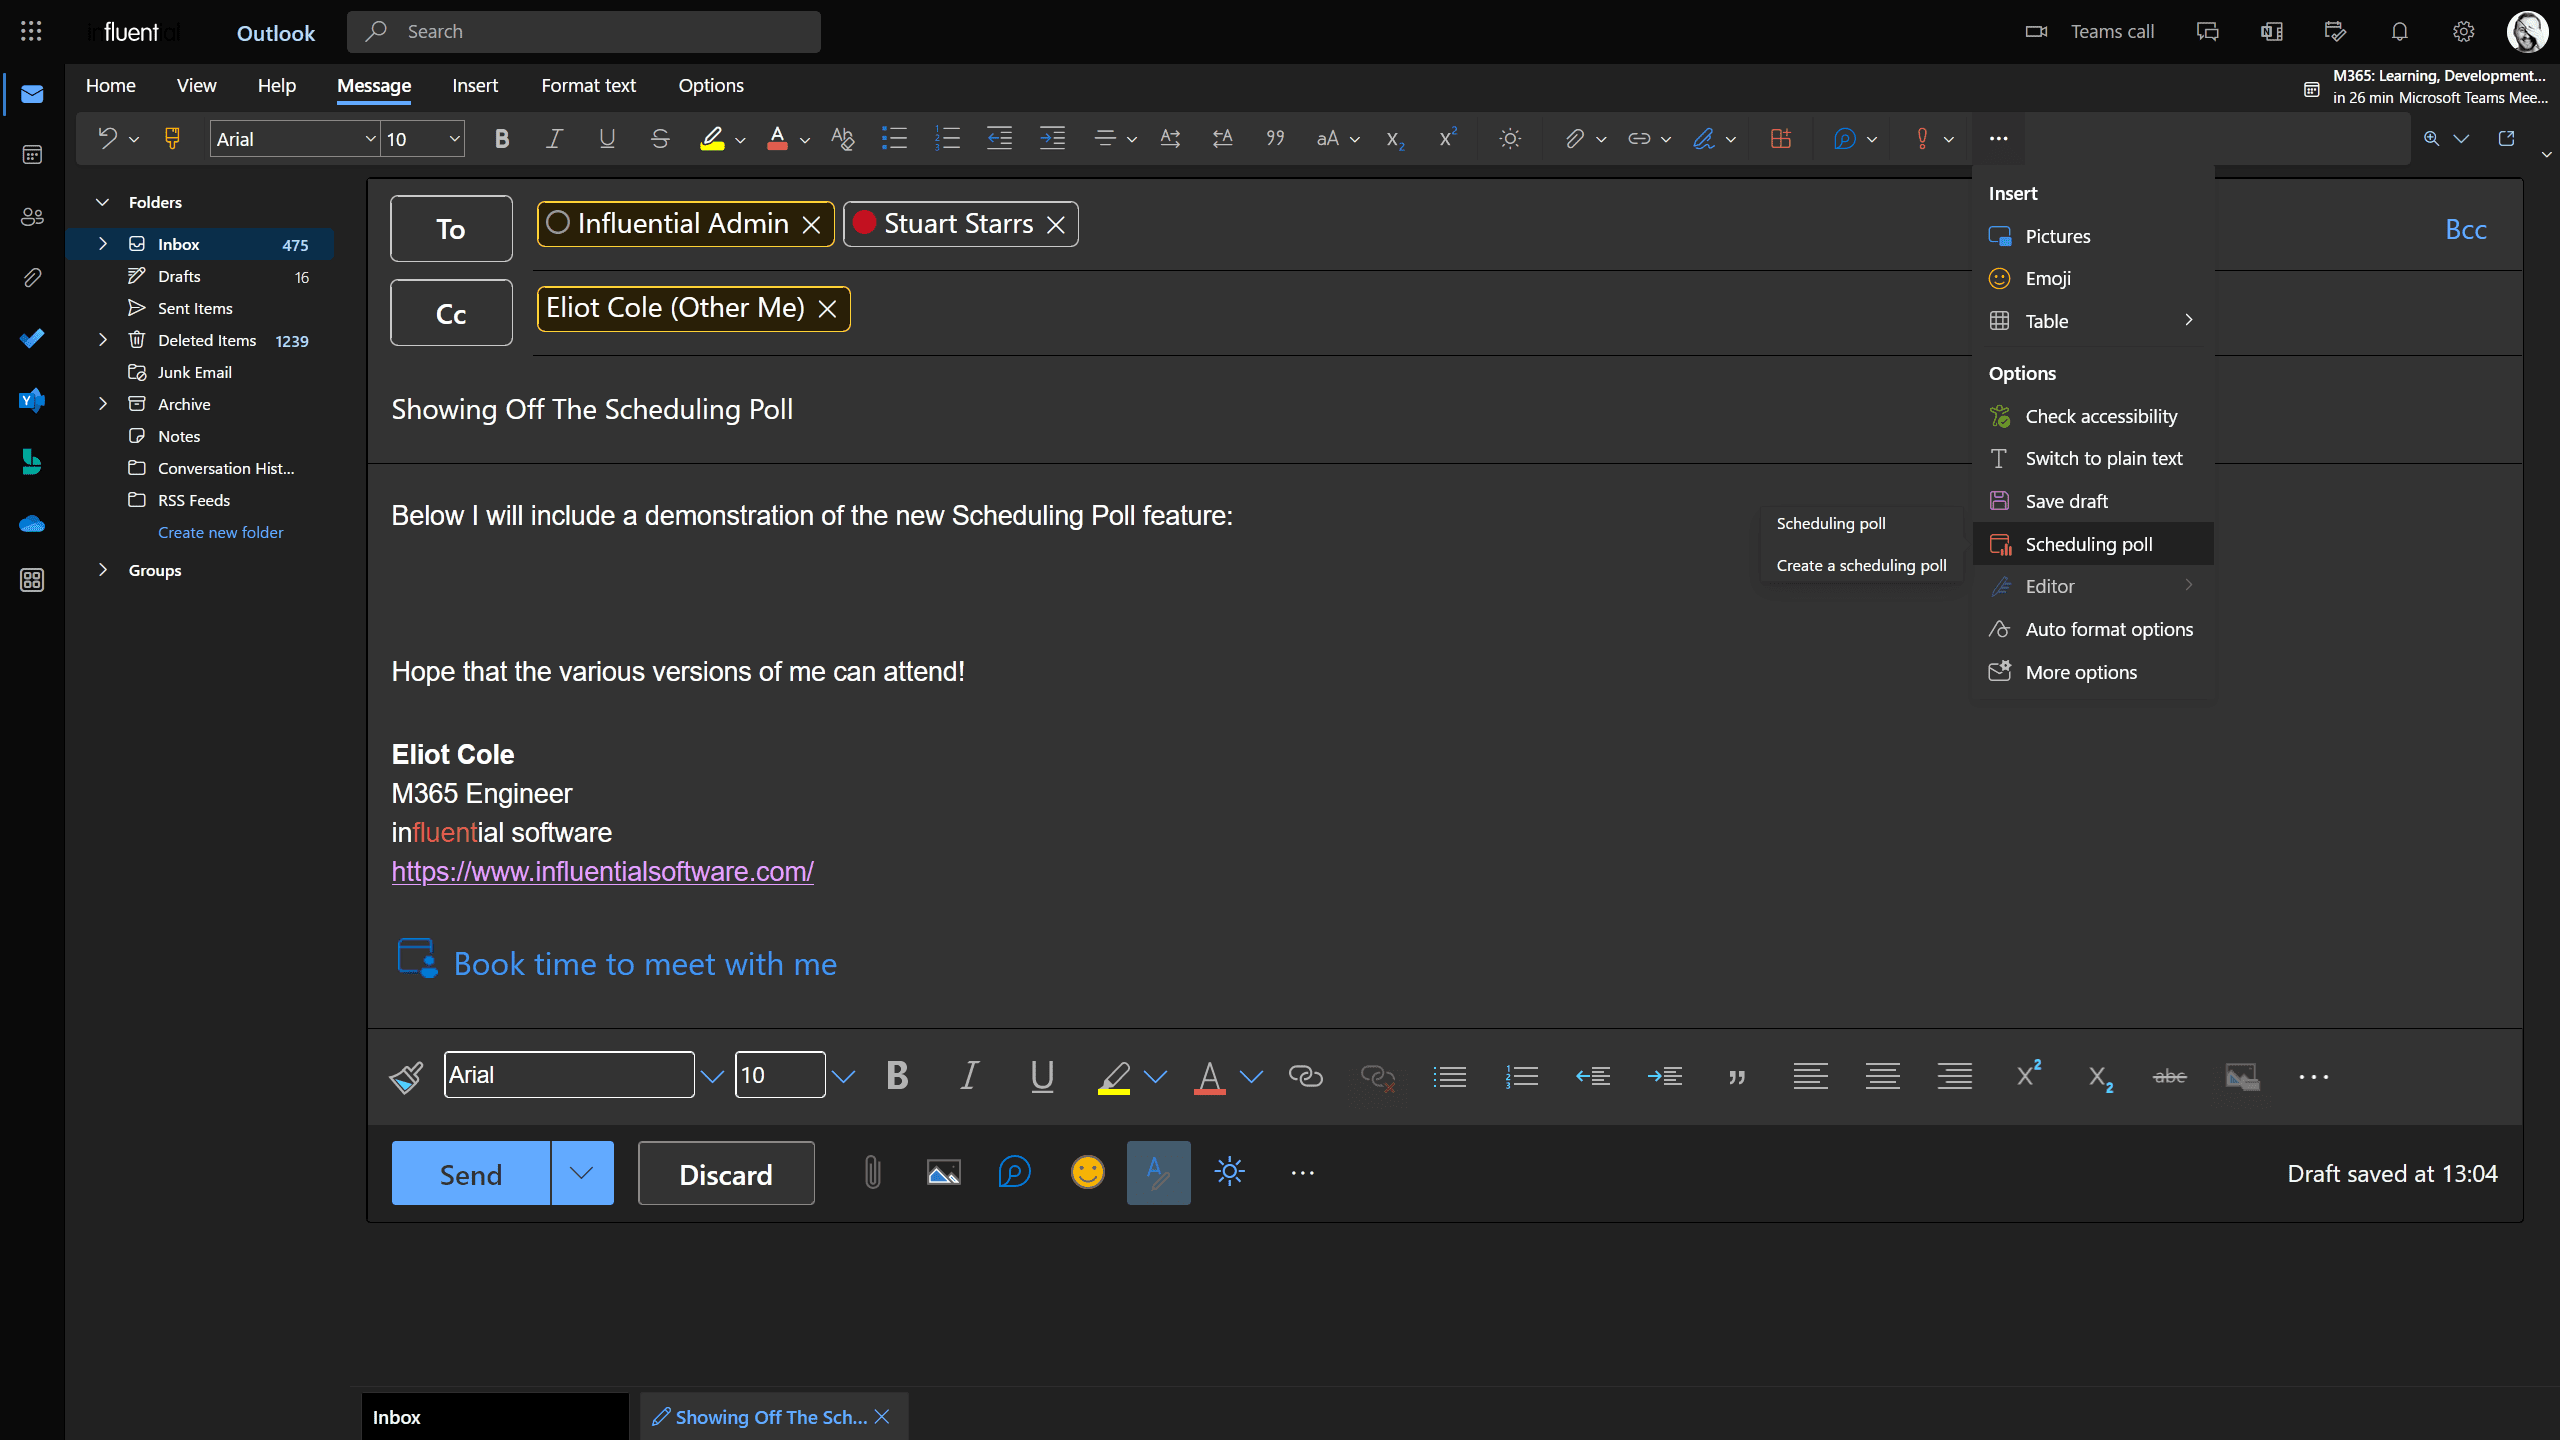
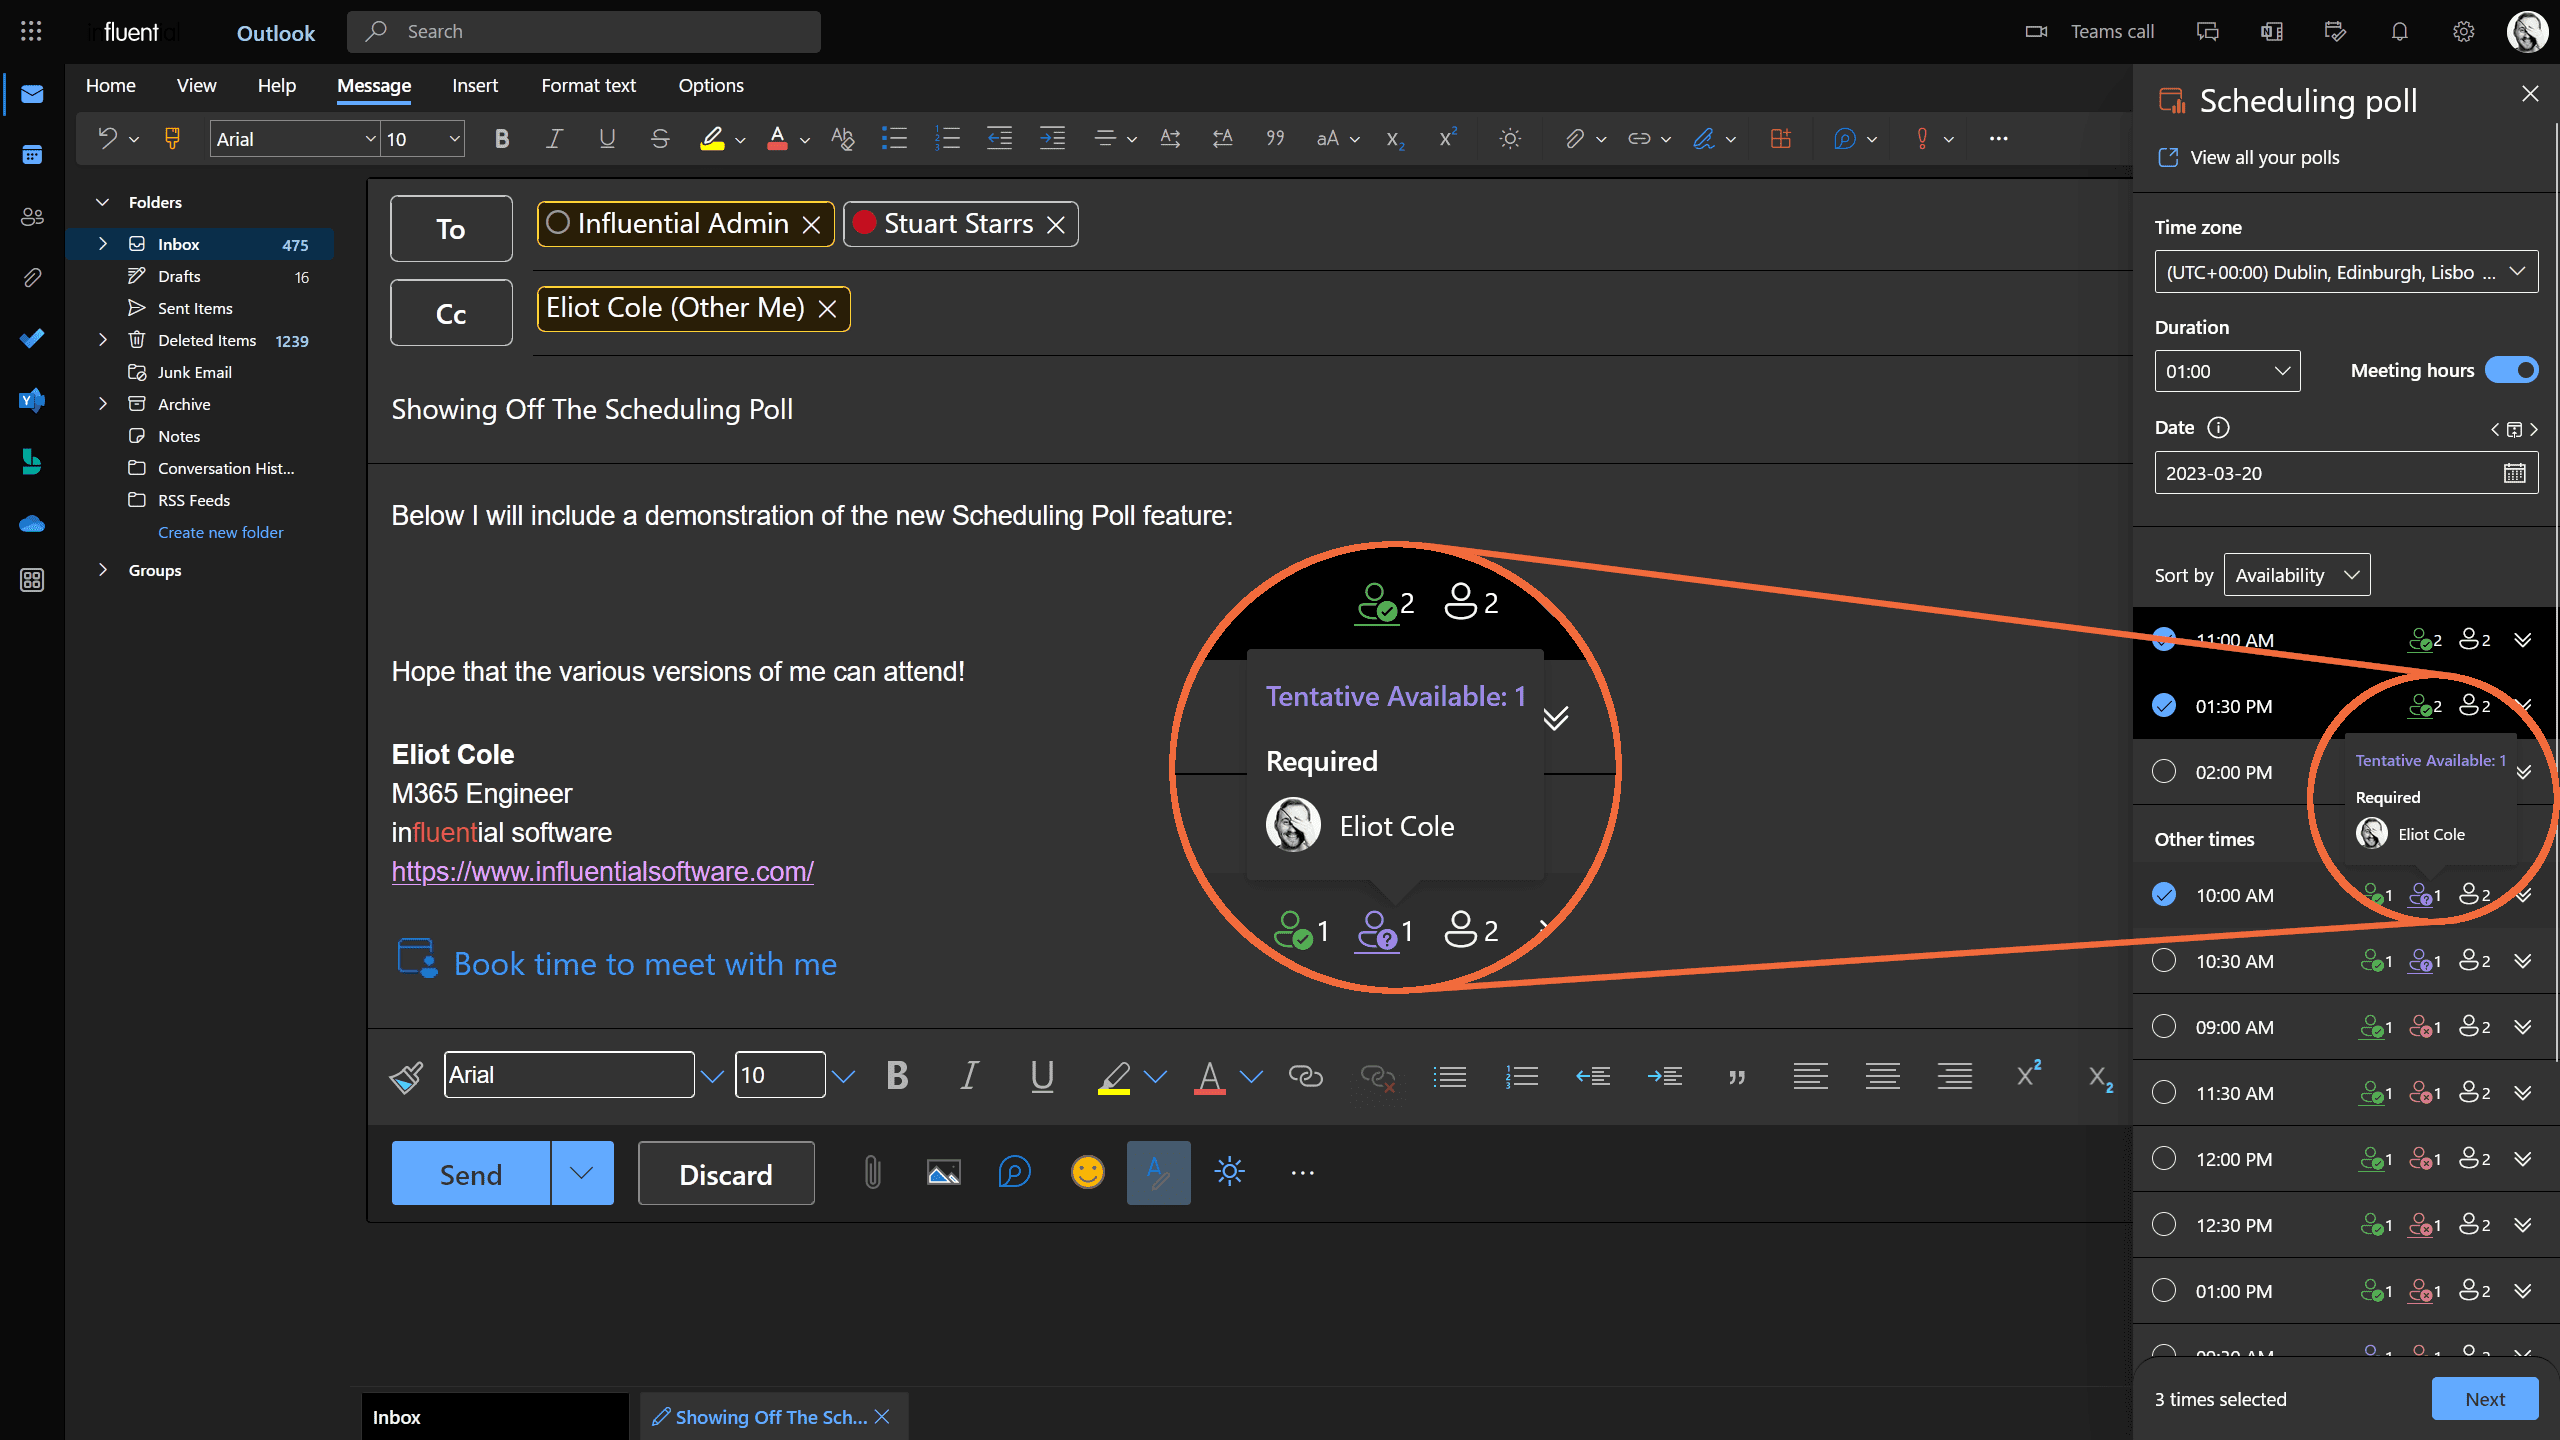
2. Select Times
Now you’ll see options for:
- ‘Time Zone’
- ‘Duration’
- ‘Meeting hours’
- ‘Date’
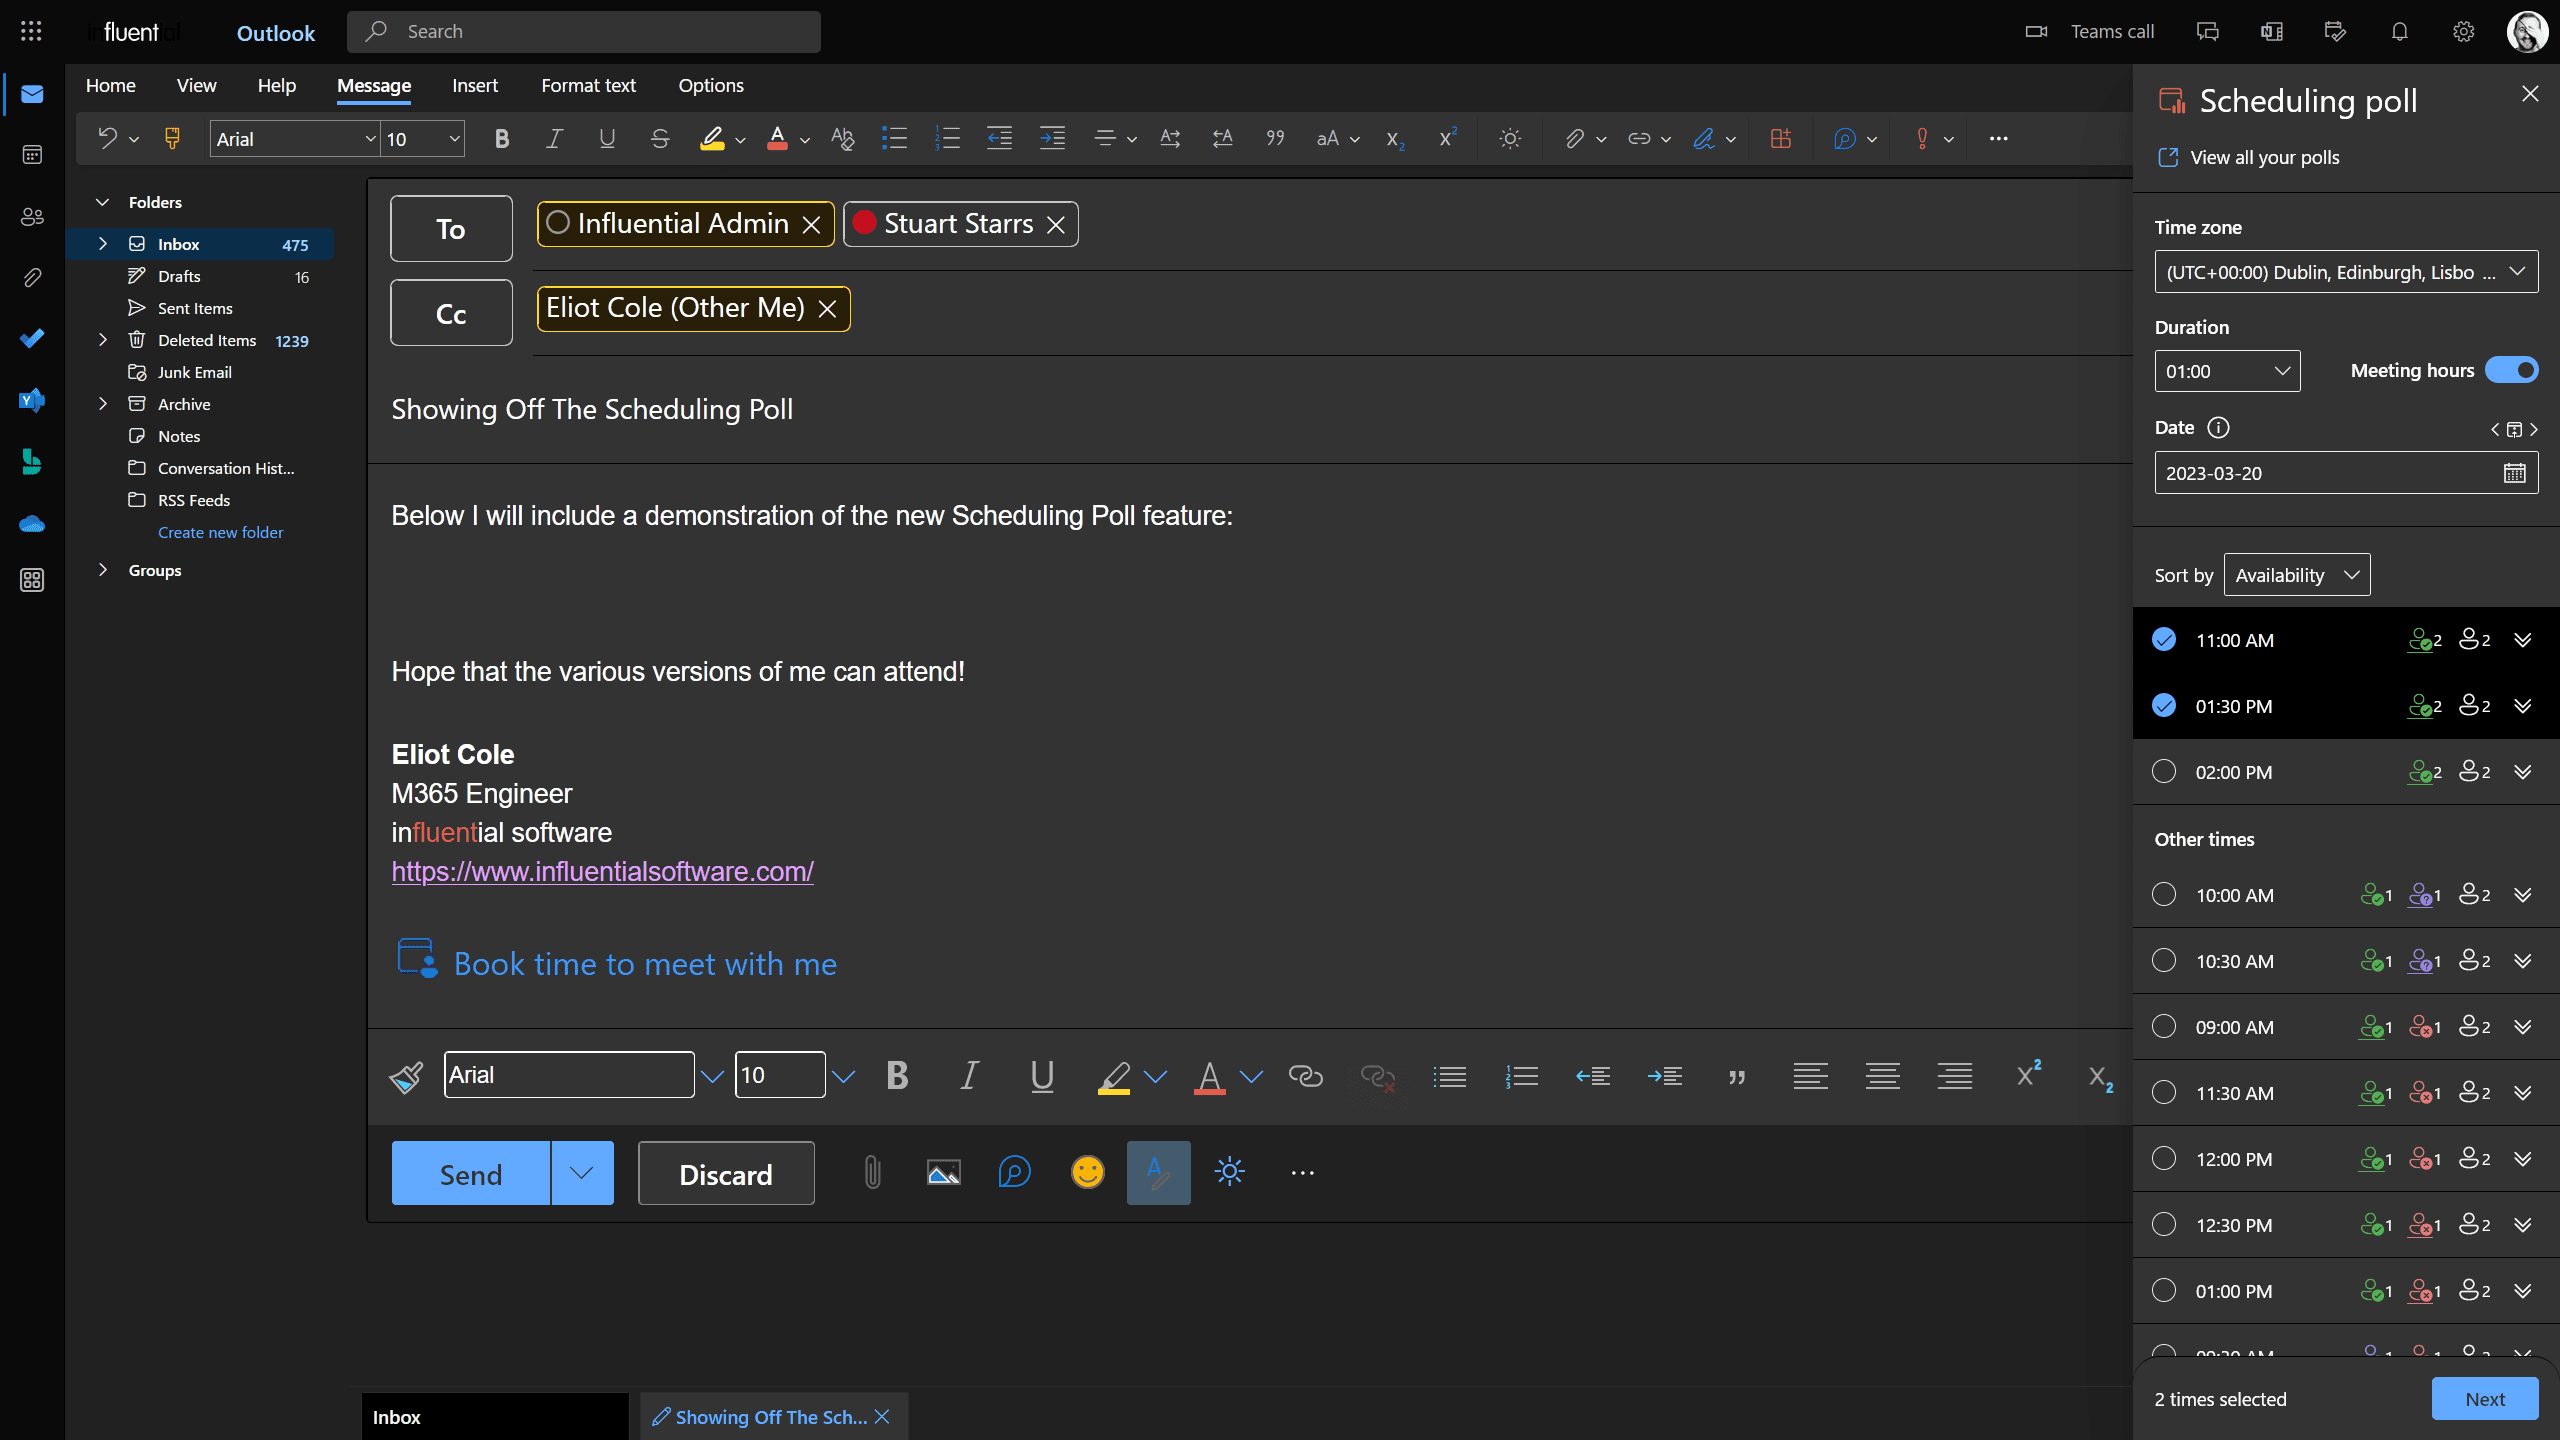
You will also see a list of meeting times presented, just select all the ones that you want to use for this meeting.
You should also see that it shows your internal colleagues’ availability. This is so that you can easily select meeting times that suit internal attendees, and present options to external attendees that all internal staff can attend without bothering them about it.
3. Scheduling Poll Options and Completion
In order to have Scheduling Poll automatically set up the meeting then you need to ensure that (as above) on this screen you select the ‘Schedule when attendees reach consensus’ option.
Additionally, to secure this for work, I recommend ensuring that the ‘Require attendees to verify their identity’ option is enabled. This will lean on Microsoft identity protocols to manage that.
You can optionally have the service pre-book the slots for you, I do not recommend this as it could fill up calendars needlessly. However this will ensure that (where possible) all potential slots should stay available with all potential attendees. This choice is for you, really.
Finally, just tap the ‘Create poll’ to finish making the poll.
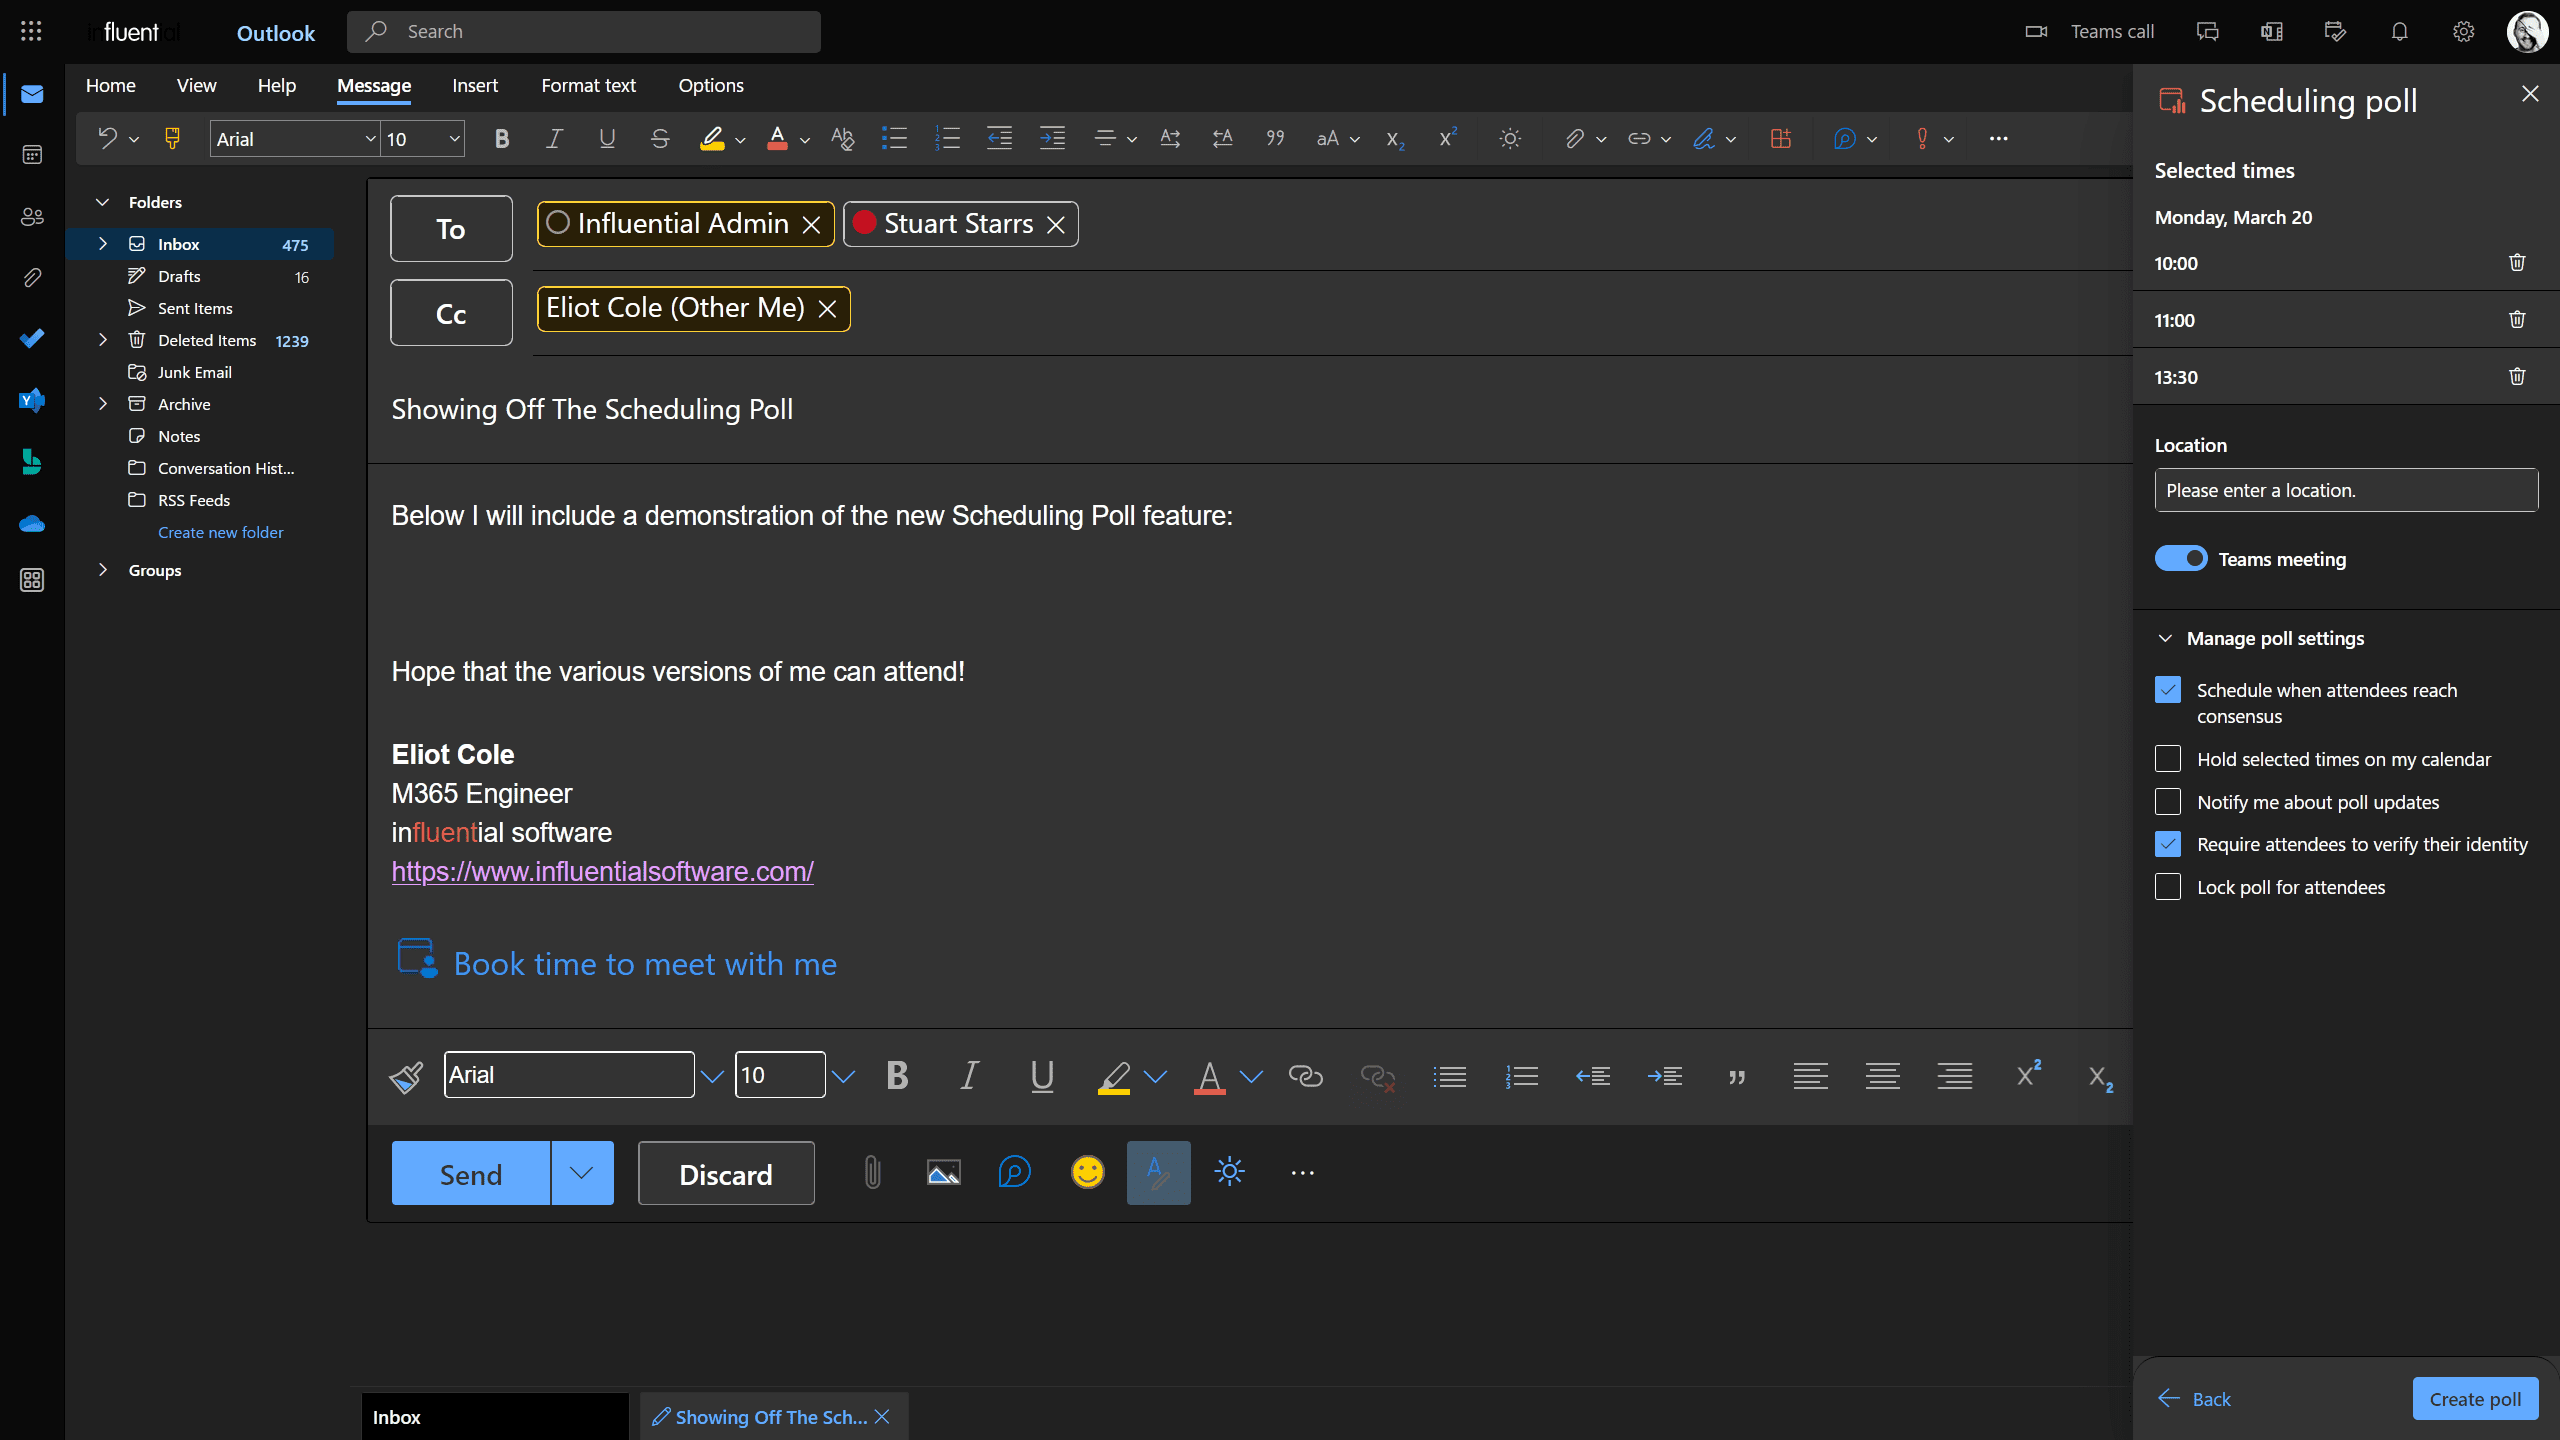
This inserts a nice button and box in your email, and you are ready to send your email.
4. Sending and Checking Up On Voting
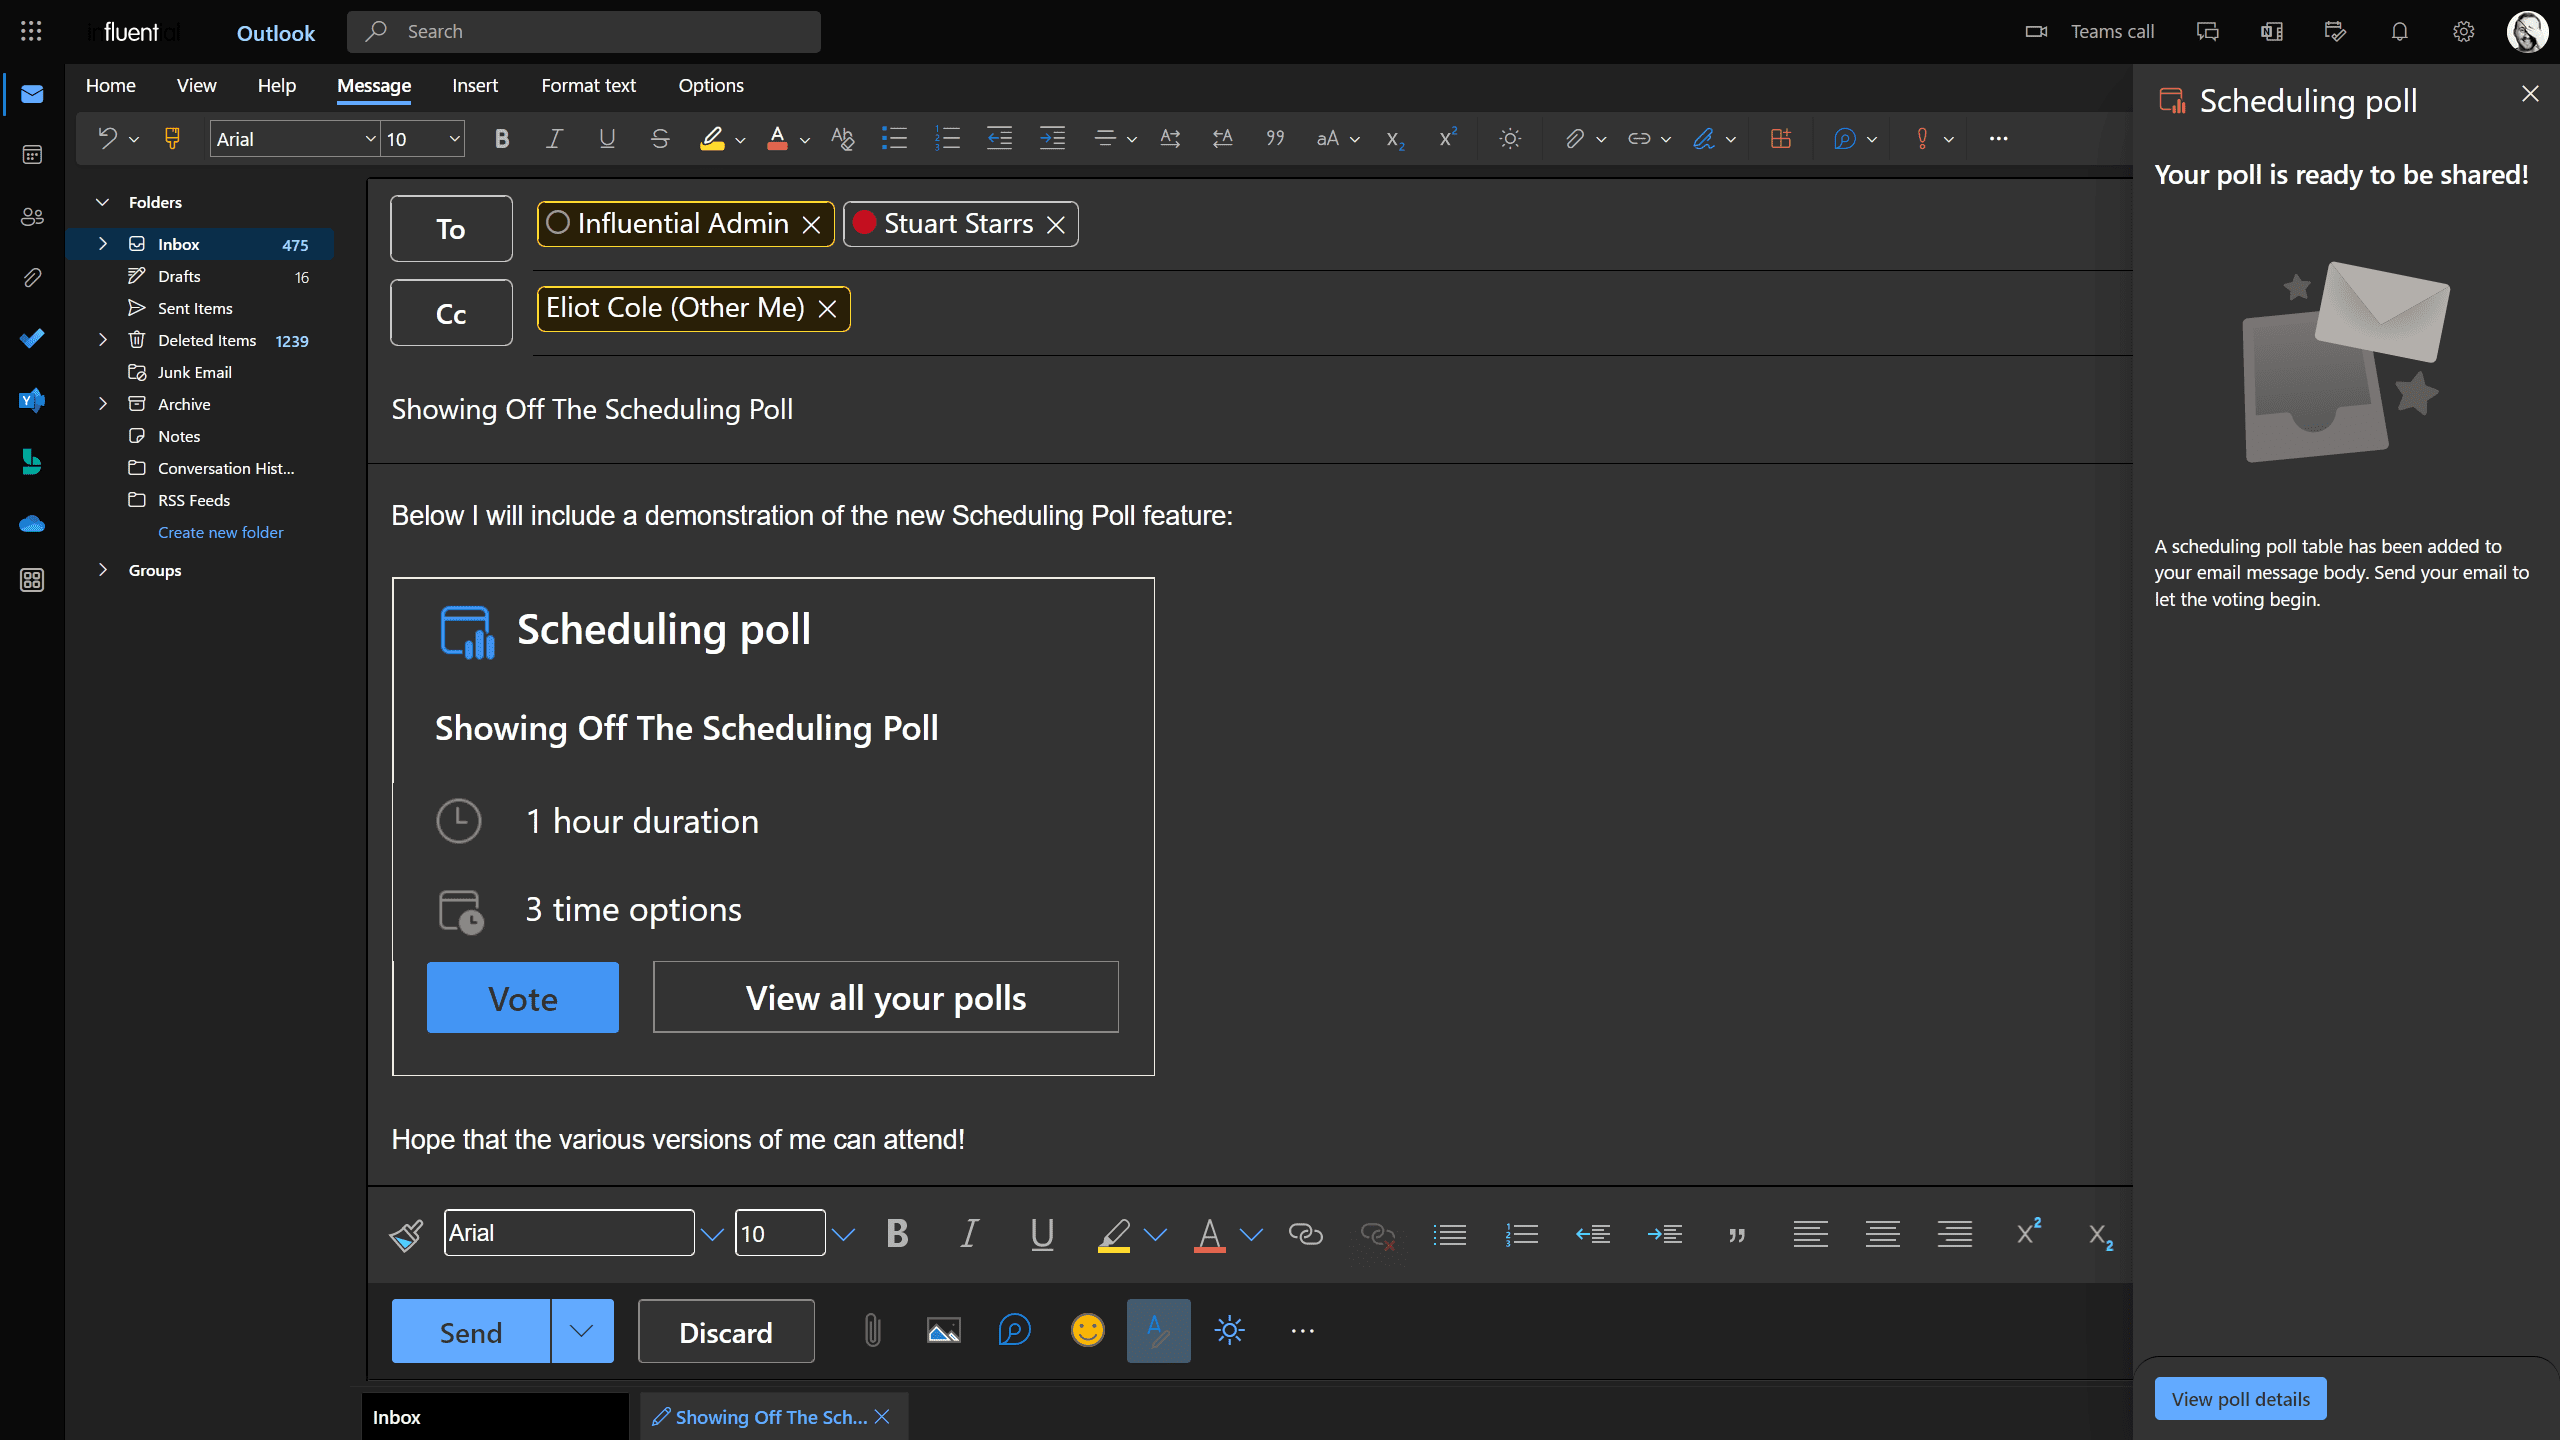
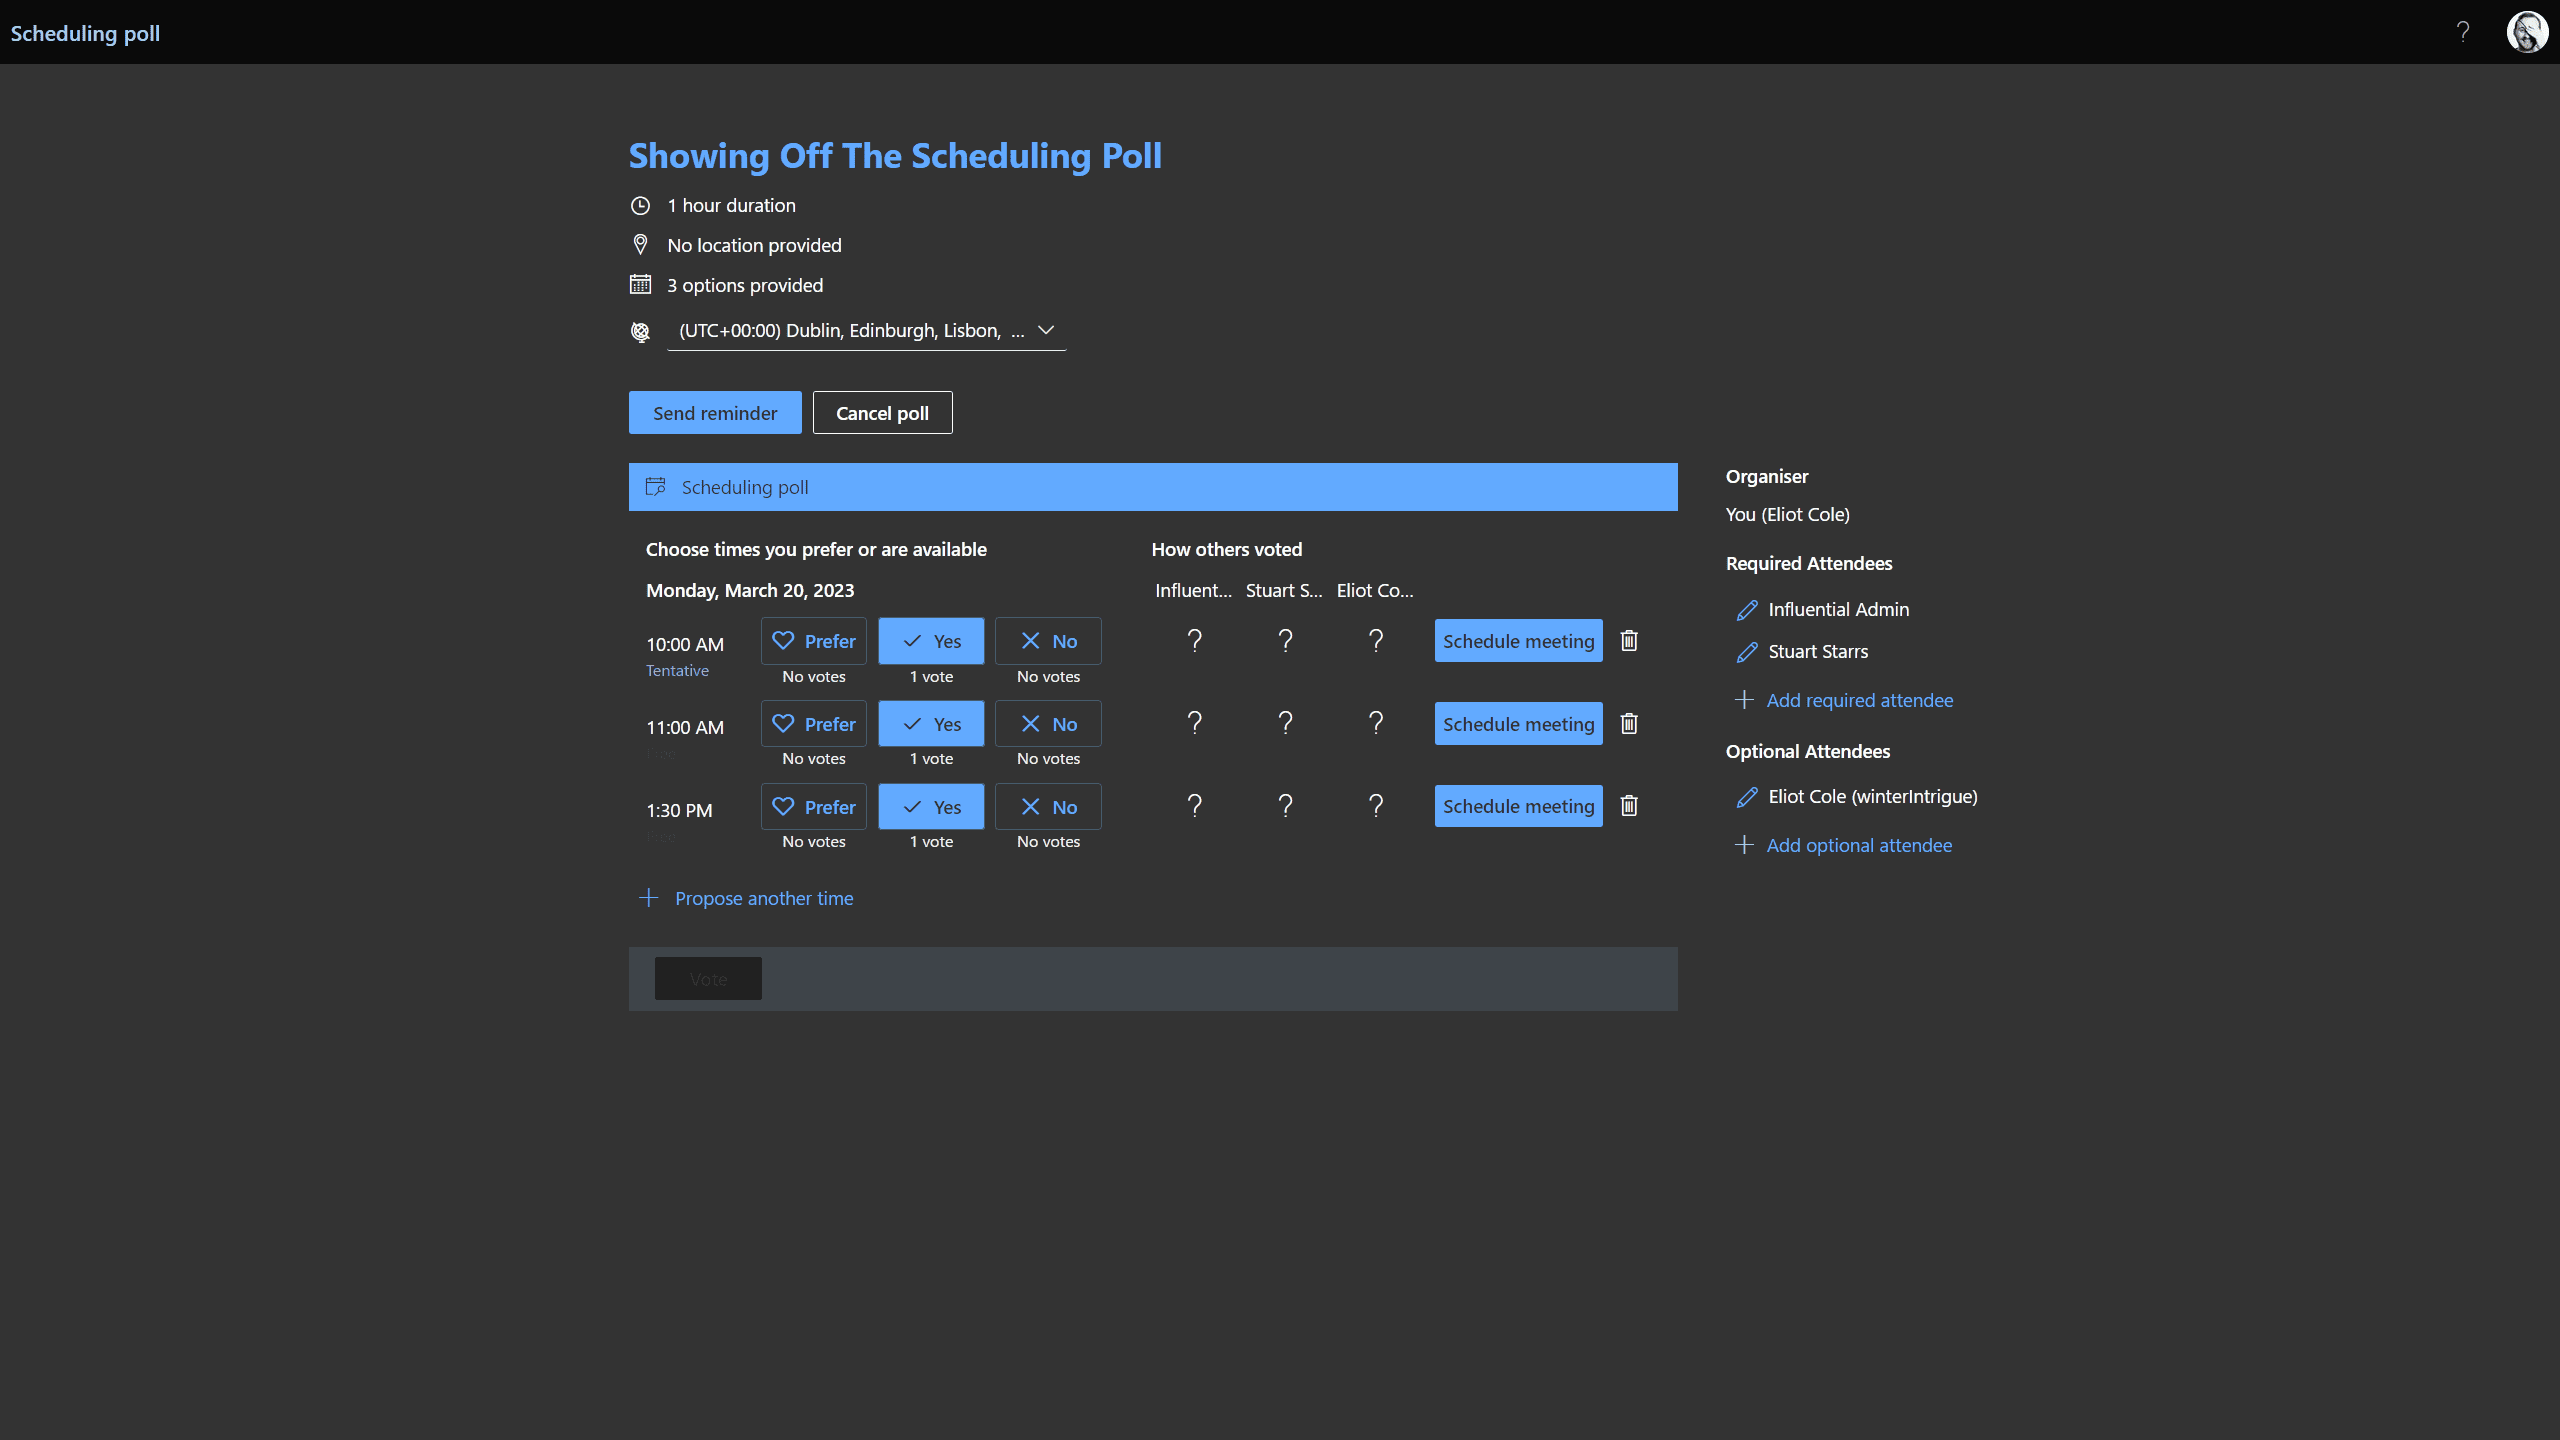
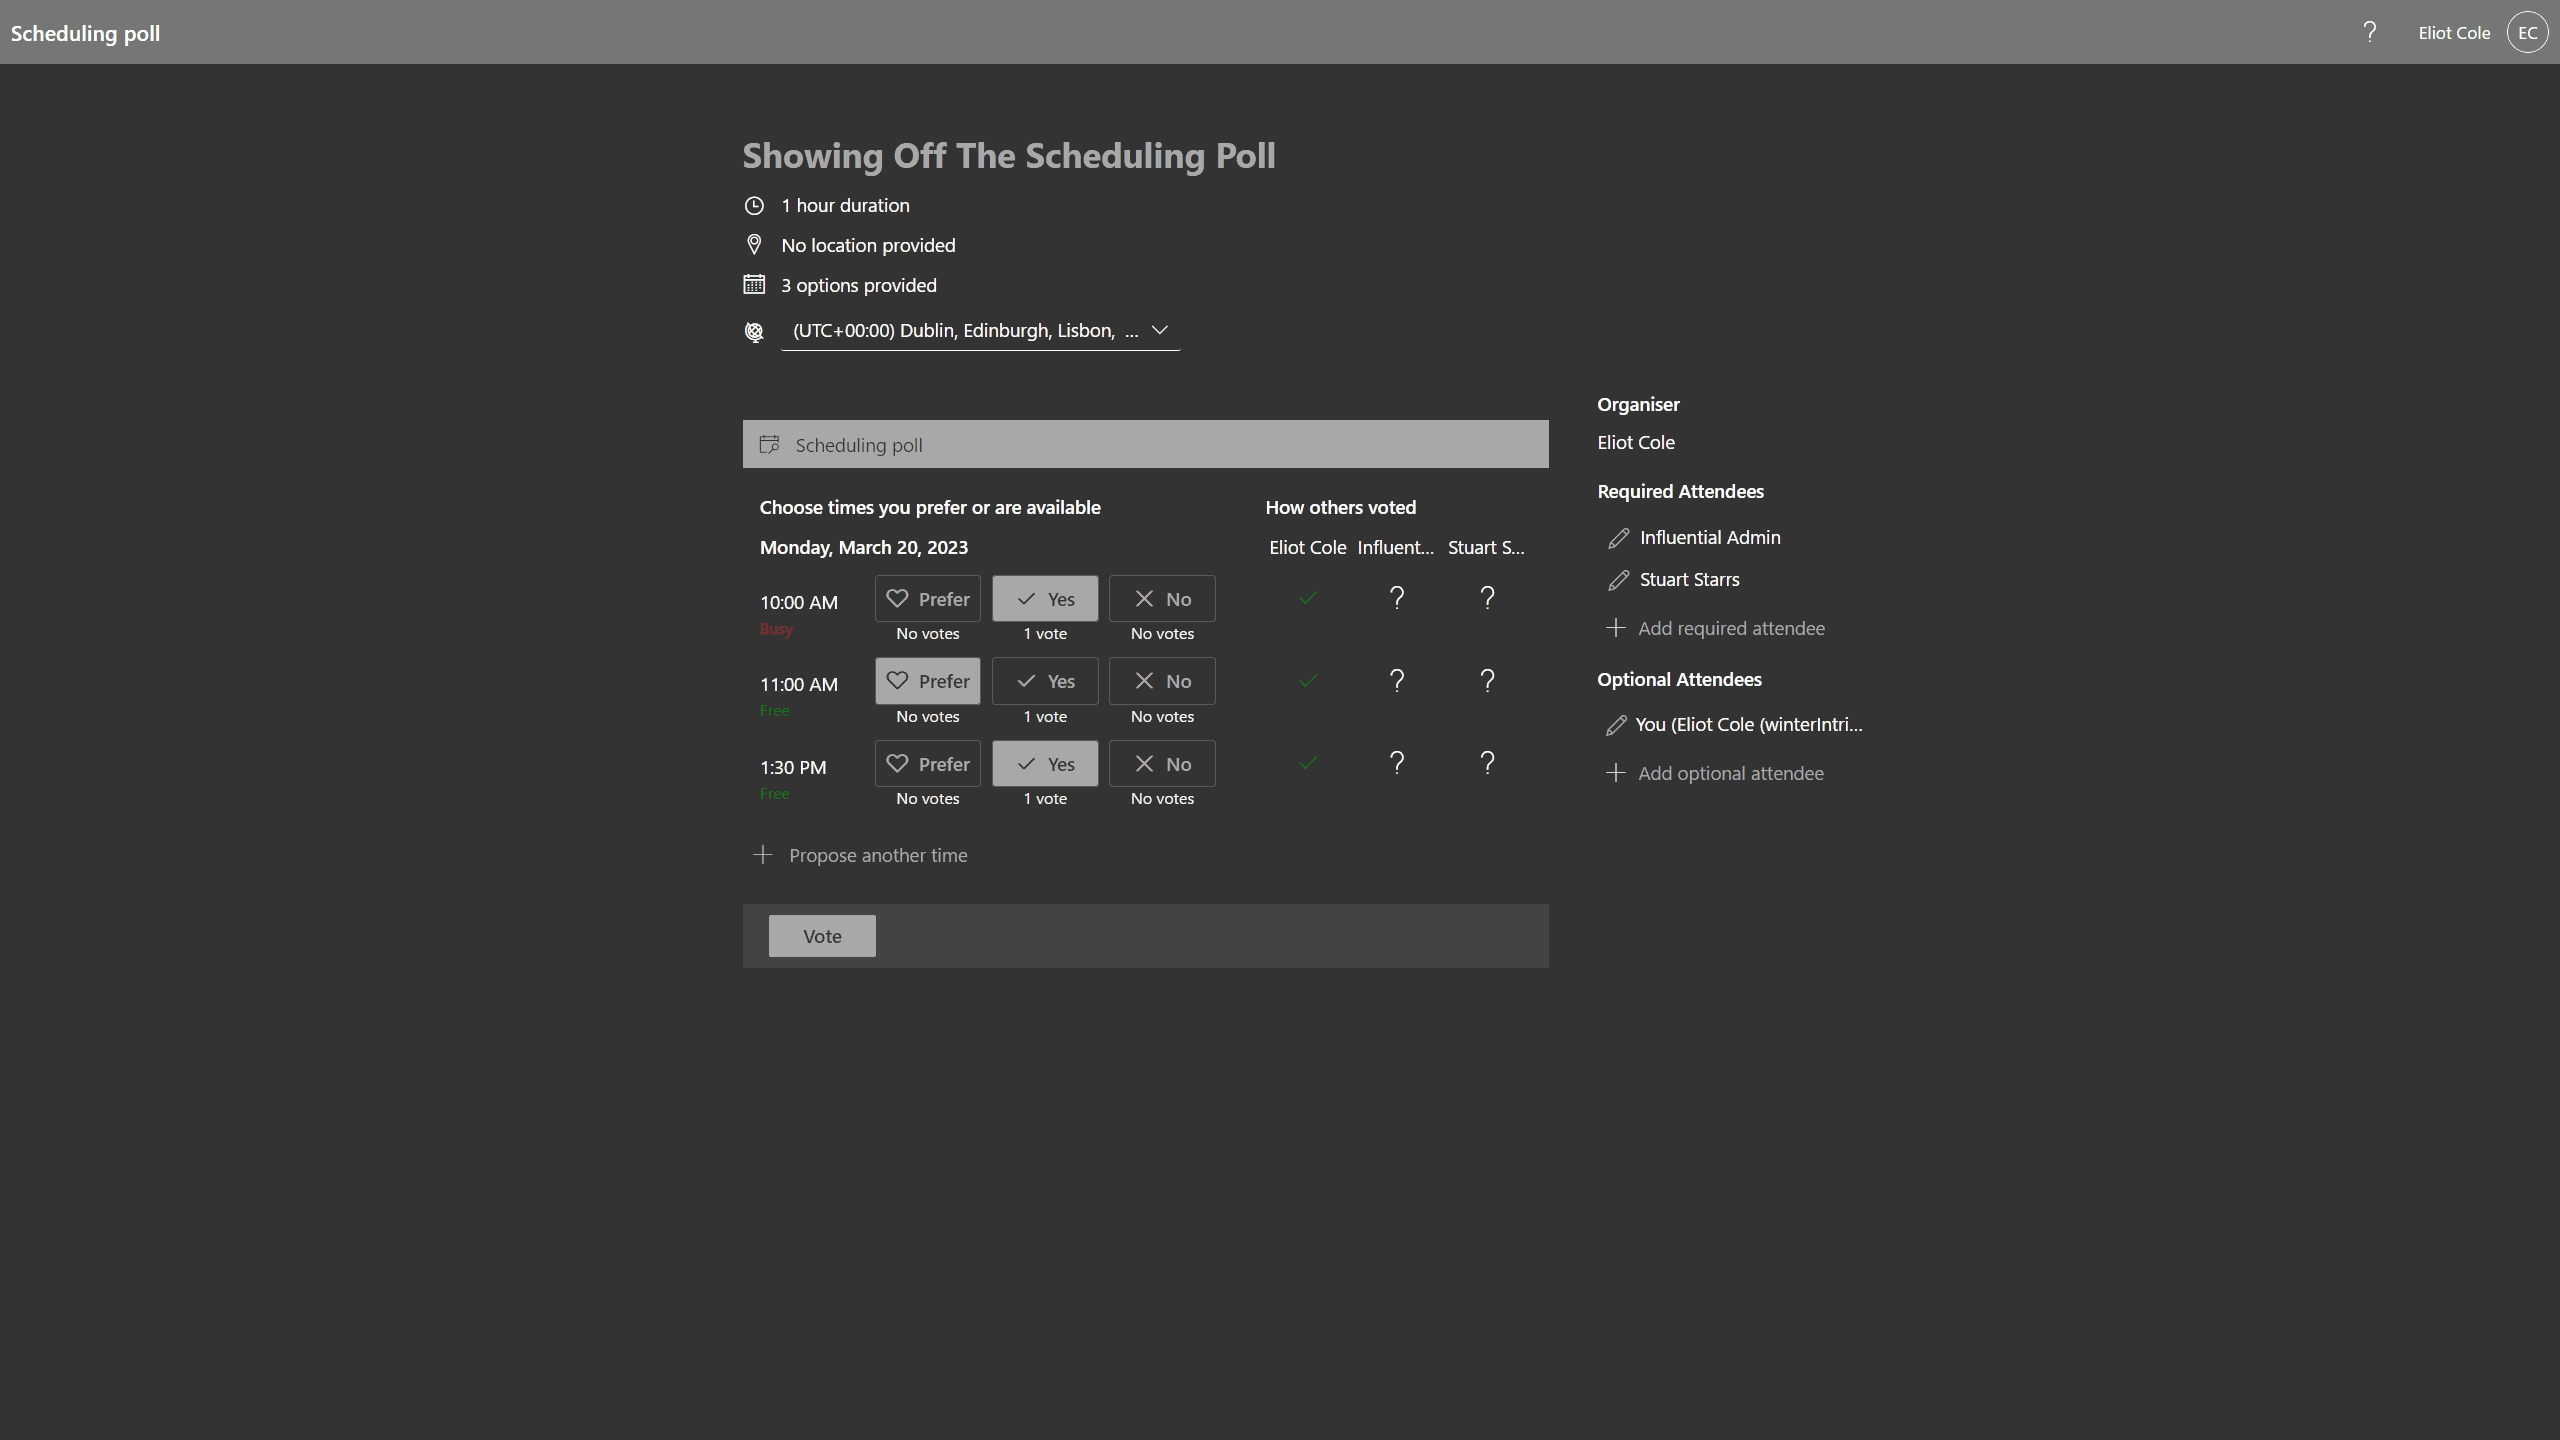
You’ll have noticed that ‘View poll details’ button at the end of the creation screens.
If you tap that you’ll be taken to the above screen to both vote on the poll yourself and see the status of others votes. You can also reach this screen from your polls list.
Things You Need To Know For Automated Meeting Scheduling
There’s a few things you should be aware of when making an automatic meeting:
- ‘To’ = ‘Required’ attendee
- ‘Cc’ = ‘Optional’ attendee
- The meeting will create immediately once all ‘Required’ attendees have voted
- Optional voters cannot vote once the meeting has been arranged
- The time is decided on the earliest fully agreed time and date
- Where voters indicate times they ‘Prefer’ (see next image) the earliest, with the most votes, is selected
What Do The Results Look Like?
When all is said and done what does this all look like?
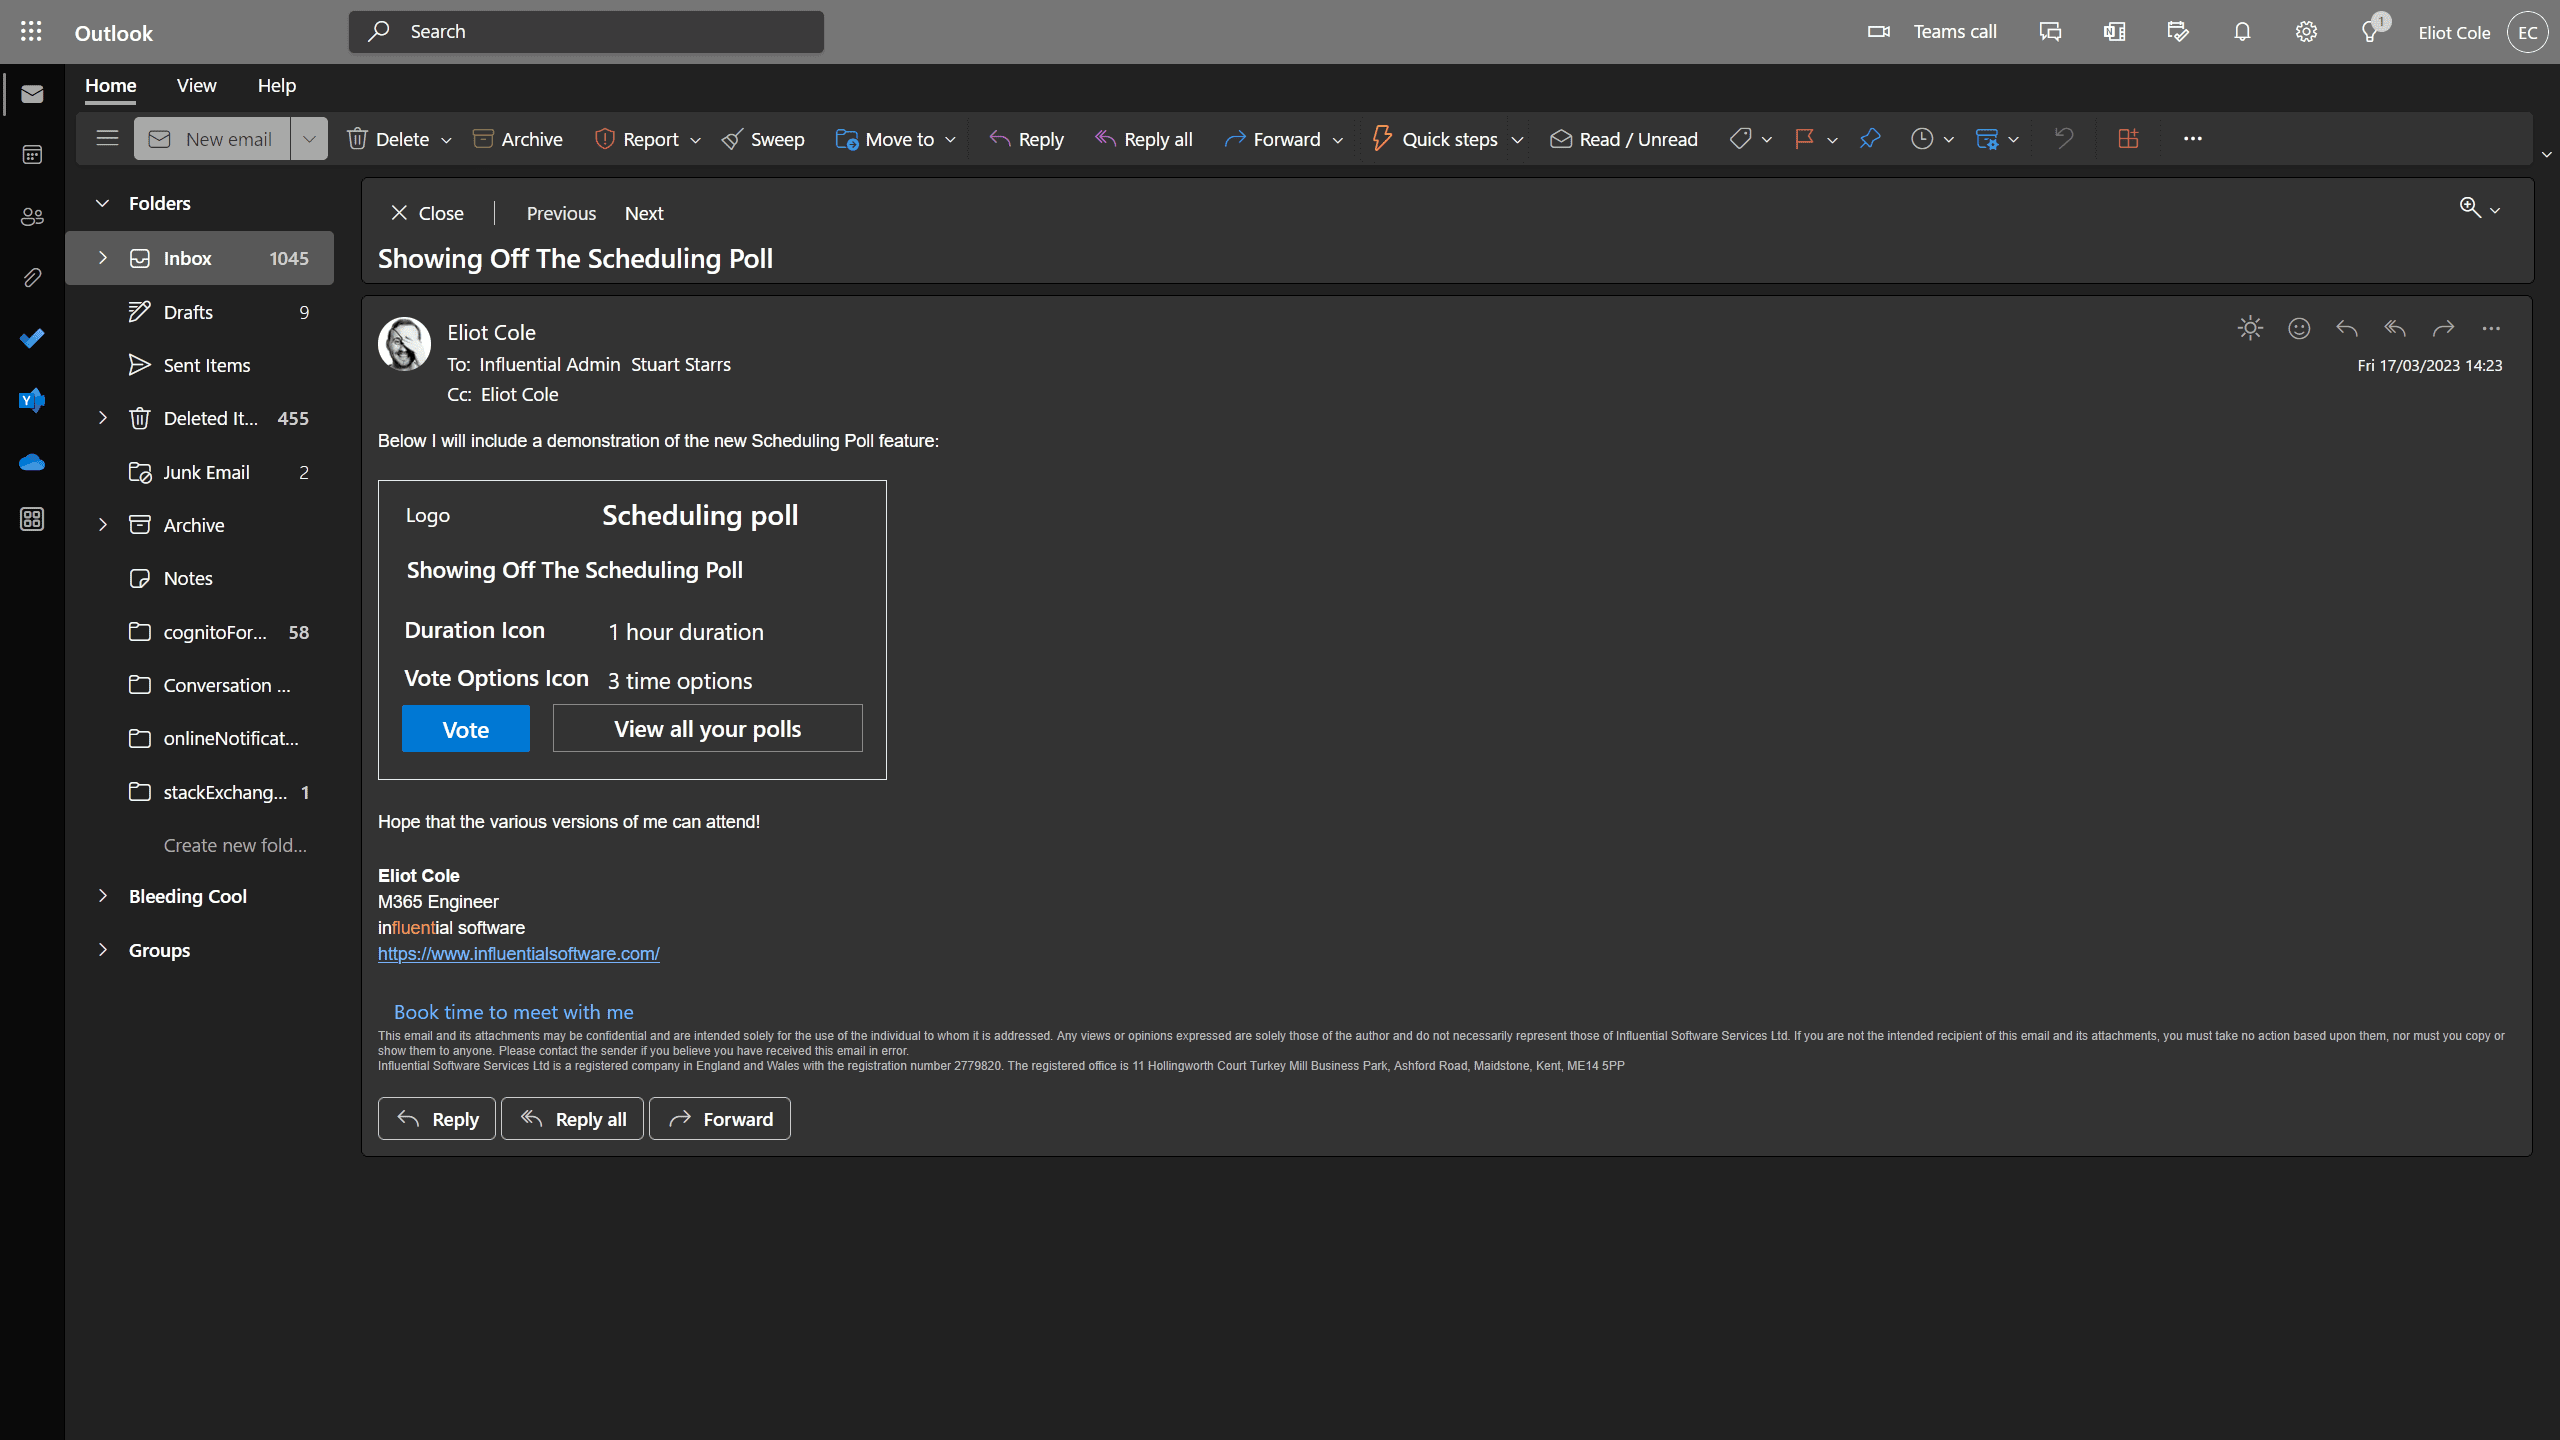
Well, the above images show you what a received email looks like above, and what the recipient’s voting screen could look like.
Finally, once all the votes are in you’ll get the above mail. Note how it picked the time that had the most preferred votes.
That’s all she wrote! Good luck, and happy meeting hunting to all!
Eliot is a MS365 engineer here at Influential. He is our resident Microsoft expert and is a technical superstar.